Your first deployment
The first step is to create an application in the Codefresh UI.
Fork the following repository in your GitHub account https://github.com/codefresh-contrib/aws-gitops-app-manifests.
It is a simple Helm chart (the package manager for Kubernetes) that contains two manifests, one for the application and one for the Kubernetes service.
After you fork the repository, edit the file simple-java-app/values.yaml
and change the repository line to your own <dockerhub id>.
replicaCount: 1

image:
  repository: <your dockerhub id>/my-app-image
  pullPolicy: IfNotPresent
  # Overrides the image tag whose default is the chart appVersion.
  tag: latest
Then in the Codefresh UI click on GitOps on the left sidebar. Click the Add application button and in the middle of the dialog choose the Provision a new application tab.
Fill in the details.
- Name:
GitOps example - GitOps integration: Should be preselected
- Project: default
- Application:
my-java-app - Manual/Automatic toggle: Choose automatic
- Repository URL:
https://github.com/<your github>/aws-gitops-app-manifests - Revision: HEAD
- Path:
./simple-java-app - Cluster: “in cluster”
- Namespace: “default”
- Directory recurse: true
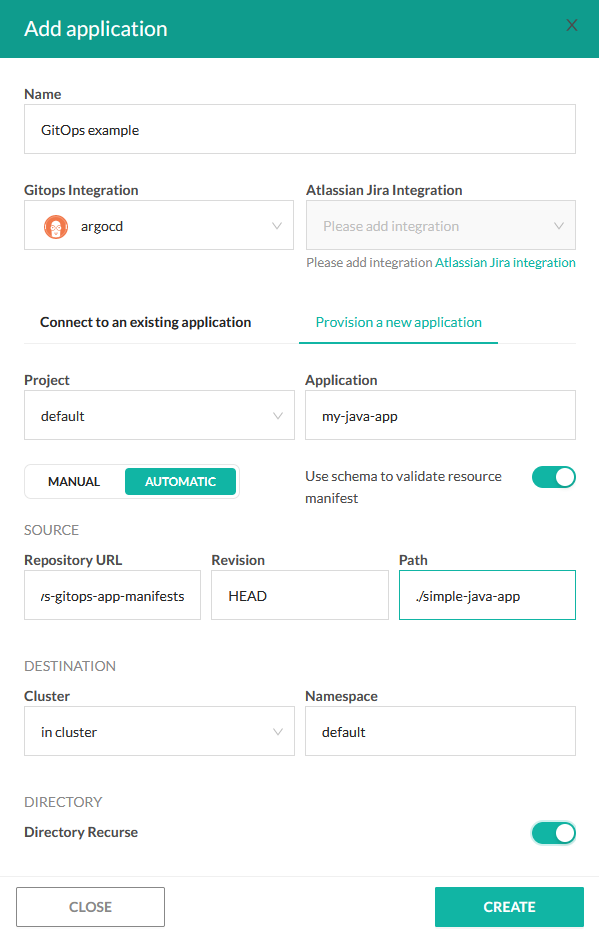
Click the Create button and wait for the first deployment to take place. At this point Codefresh is instructing your cluster to match the cluster state with the manifests in Git.
After a while your application will be deployed and you should see a “Healthy” status in the dashboard.

For simplicity reasons we deploy the application to the “default” namespace of the cluster. It is also possible to choose other namespaces for different applications.
Viewing the deployed application
The application is now deployed in the cluster and is exposed via a Kubernetes service. To find out the IP of the service you can click on the application row in the GitOps dashboard and then in the next screen, choose the Services tab.
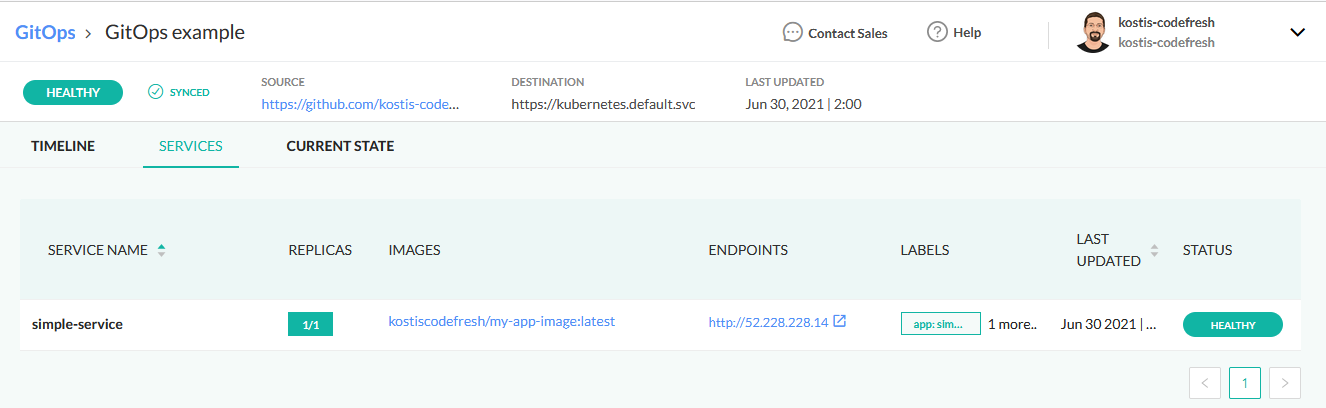
This screen shows all exposed services that your application defines. Under the Endpoint column you will see the IP address of the service (it is different for each deployment).
Click on the URL and you should see the application on your browser.
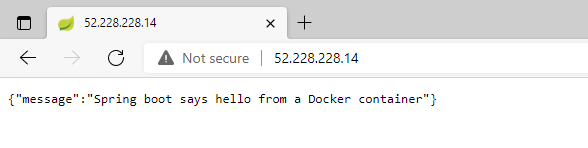
Congratulations!
Deploying a new version
The first deployment is now active. To see how GitOps works in practice, we will make some additional deployments.
The main concept of GitOps is that ALL operations are happening via Git.
To create a new application version make a change in GitHub in the aws-gitops-app/src/main/java/sample/actuator/HelloWorldService.java file.
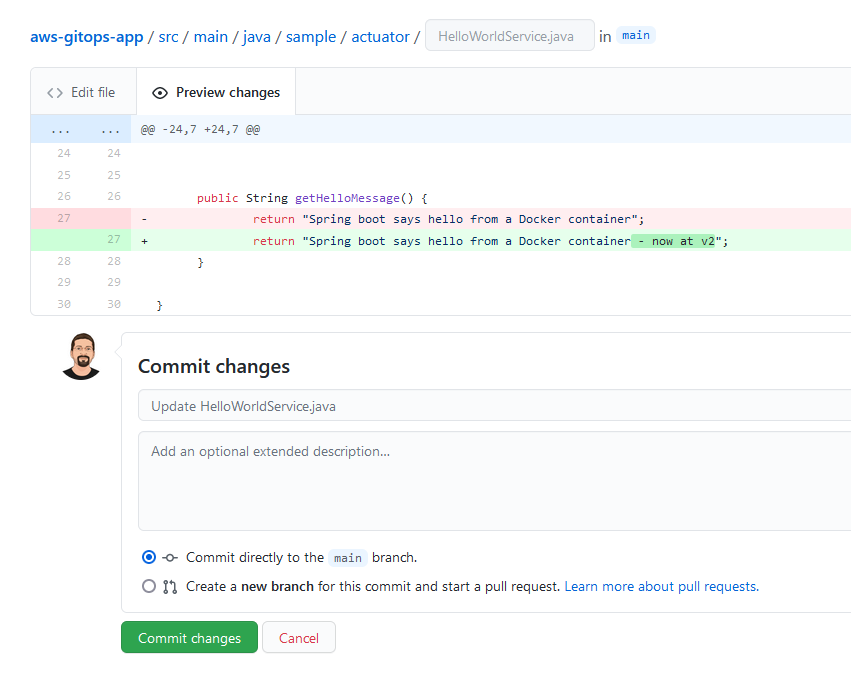
The exact change is not really important. Feel free to change the hello world message to something else (but keep the word “Spring” as it is checked by a Unit test).
For simplicity reasons we make a change straight into the main branch. In a production application we would make the change in a feature branch and create a pull request before actually accepting the change.
Commit and push your change and then click on the Builds section on the left sidebar in the Codefresh UI. Codefresh will automatically launch a pipeline to create a docker image as was described in the previous section.
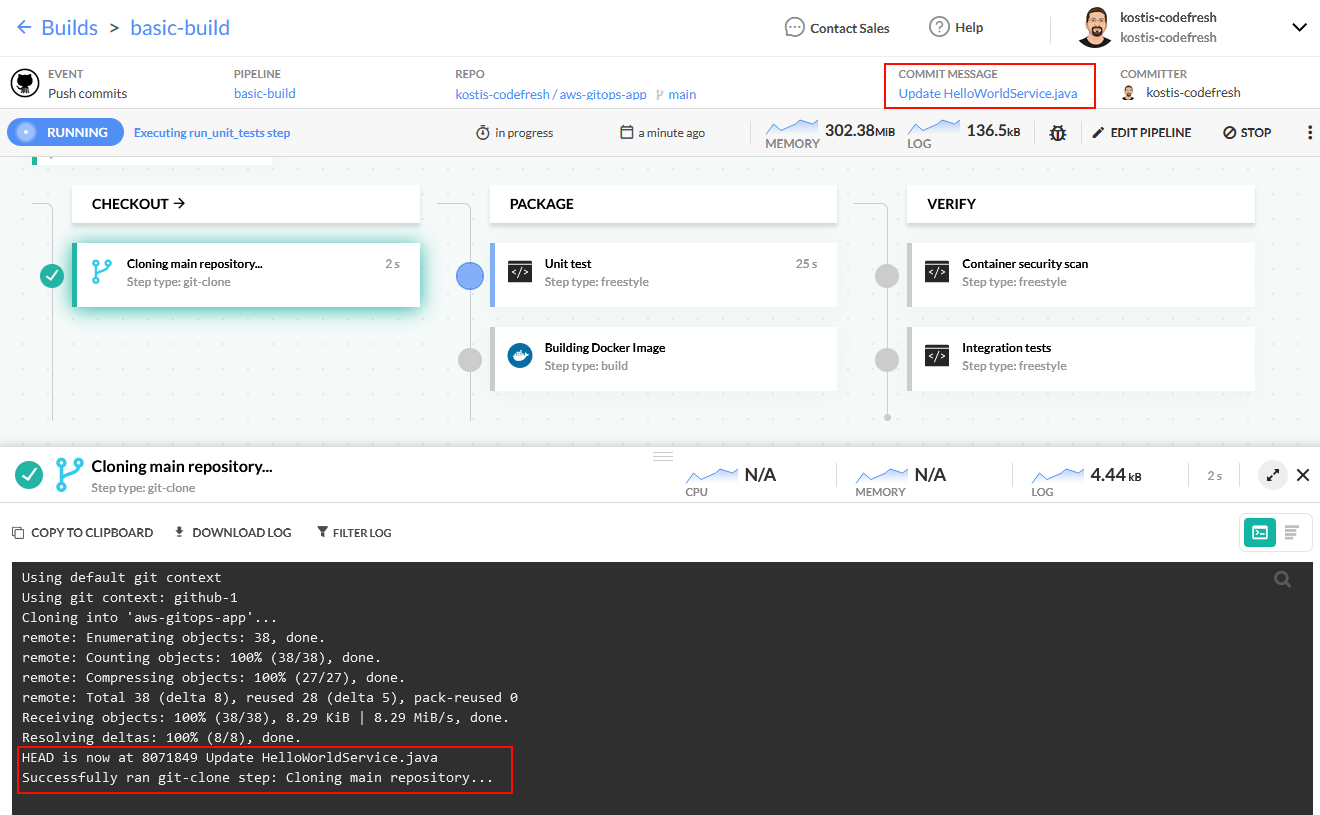
After the pipeline has finished a new Docker image will be created. Click on Images on the left sidebar and click on “my-app-image”.
In the Activity column note down the last tag of the container image.
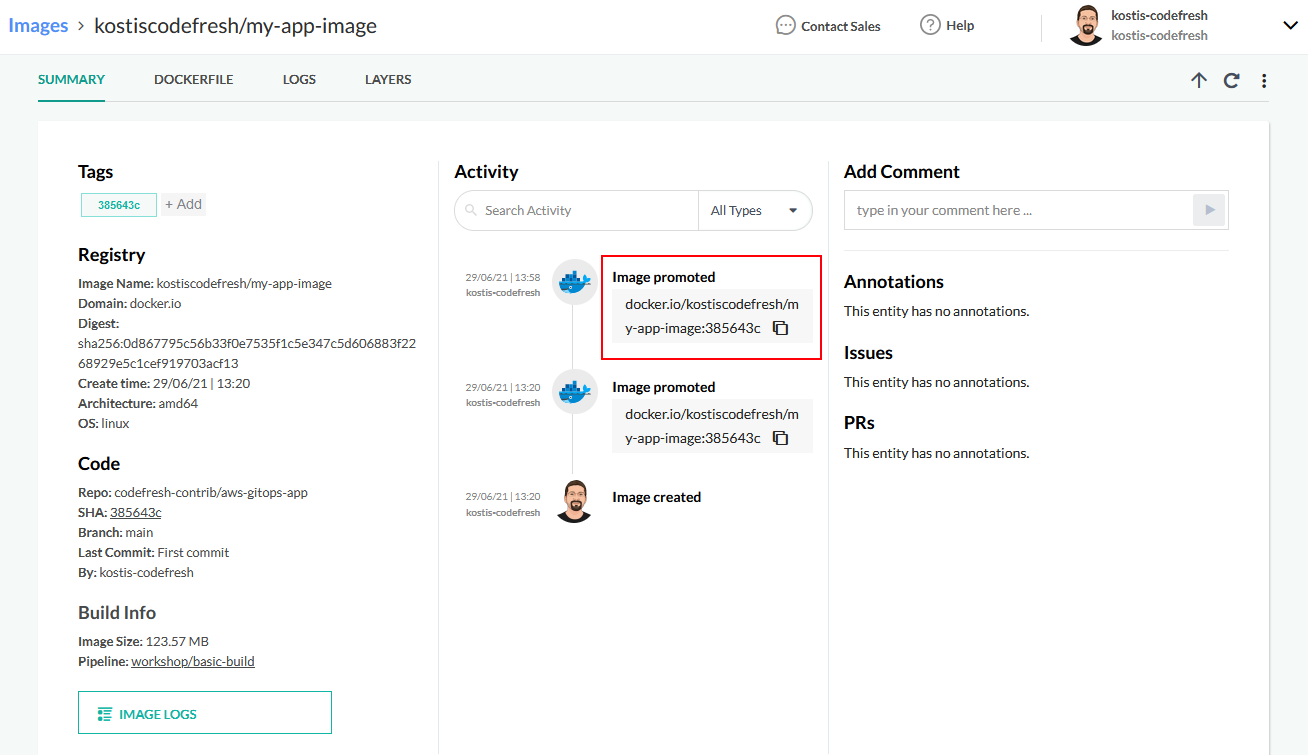
In the example above it is docker.io/kostiscodefresh/my-app-image:385643c
Now in Github go to your second Git repository that contains the Kubernetes manifests (and not the application source code). Edit the file aws-gitops-app-manifests/blob/main/simple-java-app/values.yaml and enter your new container tag.
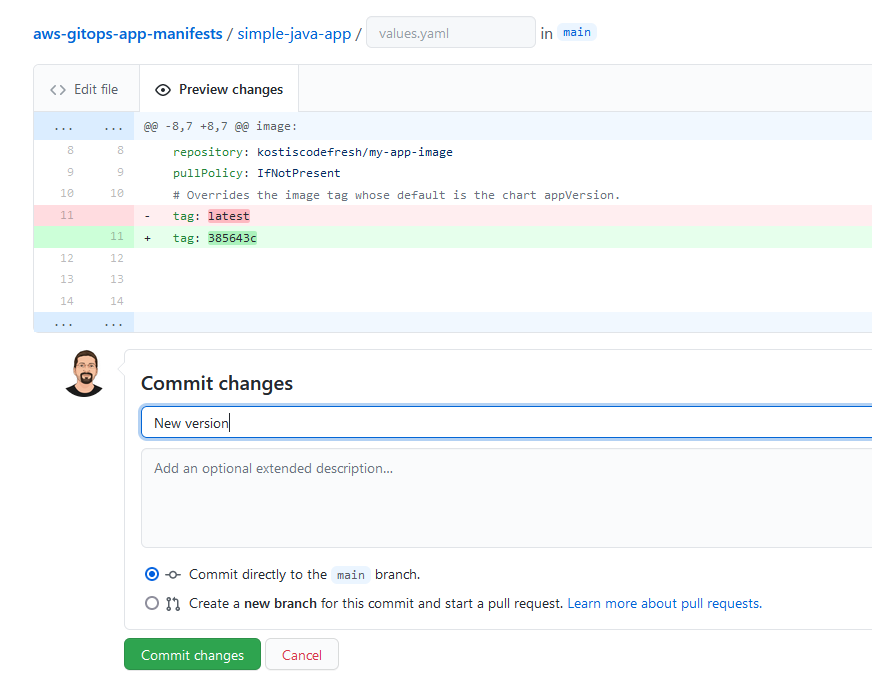
Commit your changes and after a brief amount of time, Codefresh GitOps will fetch the new container image. If you now visit your application endpoint in your browser you will see the new status message. If you don’t remember your endpoint URL go back to your GitOps dashboard, click on your application and then find your endpoint in the second tab called Services.
You might think that deploying a new version involves too many manual steps. Will automate the version change in the next section of this workshop. The important point here is that deploying a new version happens only via new changes in Git and not clicking buttons on running scripts manually. Using only Git operations is the pillar of GitOps.